Haven't done much on the railmower project for the last month or so, as you can tell by the gap in posts, mainly because I've been doing motorcar exhibitions and volunteering with Capital Metro (see my RPI OL Activities blog at http://rpiolactivities.blogspot.com). Plus this continuing high heat sapped my enthusiasm for spending time outside. Two weeks ago, however, I did bolt the bumper back on after painting it orange to match the motorcar trailer.
That actually was tougher than it appears. I had to line the four bolts up with two tapped holes each and those bolts did not want to go in. Had to get a jack to try to hold the two different pieces of frame in just the right aspect for the bolt to go through the bumper and through each of them. Took about an hour, par for the course for me.
On Saturday, I decided to do a little bit each morning while it was still cool. So Saturday morning I got out my gearpuller and pulled the drive sheave off. It had been put on backwards (again, par for the course; if it's possible to do it a wrong way, I will find the wrong way and do it). Then this morning I remounted it, using a hammer and a block of wood. After getting it on, I hammered in the square key. Finally, I tightened the screws down (one tightens down onto the square key) to hold it in place. In the process of aligning the drive sheave with the PTO clutch, I had to use the gearpuller to pull it back out a little. Unfortunately I placed the gearpuller blades on the front ridge instead of all the way behind the back of the sheave. Of course, the ridge broke off, leaving an open area. Won't render it unusable, but chalk up another mistake to give me experience. Won't do that again. Here's what it now looks like:
I also fabricated a spacer to hold the PTO clutch in exactly the right alignment with the drive and engine sheaves and installed it.
My final job for the morning was to relocate the ignition coil. An acquaintance of mine advised me to get it away from the engine heat and vibration and suggested bolting it to the side of the tractor on the inside. I scoped that out and it looked doable so I drilled two holes and bolted the holder to the side. Then I slid the coil into the holder and used a small knurled screw to tighten against the coil. Seems pretty solid. All I need now is a longer wire between the coil and sparkplug (12 inches is not long enough in its new position). But I can pick that up at A-Line Auto Parts tomorrow.
Now I'm ready to re-install the battery and fuel tank, When that is done Frank Glatzl and I will be ready to install the new choke and throttle cables, the used fuel pump and finalize connections. Once the engine is up and running, then I will cut out the middle of the floor in the motorcar trailer. Then we will hoist the Bolens 1250 tractor, remove the transmission, install a pin to raise and lower the deck and then mount the tractor to the motorcar trailer. Lot's still to do.
Sunday, August 28, 2011
Friday, July 15, 2011
Motorcar Trailer Floor Installed
This morning I slid the 4 foot x 83" motorcar trailer floor into place and marked where the six holes to hold it would have to be drilled. Took it out and drilled the holes and slid the floor back into position. Five boltholes turned out fine and one had to be enlarged slightly to allow the bolt to fit. But I finally got the floor installed. Then I installed the trailer towbars and bolted them on, and the trailer tongues and bolted them on. With that the trailer was ready to go.
The front and rear sides are closed off by various bars so nothing larger than 1/4" can fall off. After finishing it up, I brought over two pieces of conveyor belting to protect the floor while we use the trailer for tomorrow's work session. Here's what it looks like:
Finally, I winched the trailer up and into my 12-foot trailer:
Talk about low wind resistance!! Won't be losing mpg due to the trailer on tomorrow's trip. So now RPI has a useful piece of equipment, pending installation of the Bolens 1250 garden tractor on top of this trailer. When I am ready to install it, I will take the floor off and cut the middle portion out. Then I will install the two side pieces, leaving a gap into which we will lower the 1250. That way we will have places on both sides of the tractor to store tools and supplies while pulling the rail-mower.
The front and rear sides are closed off by various bars so nothing larger than 1/4" can fall off. After finishing it up, I brought over two pieces of conveyor belting to protect the floor while we use the trailer for tomorrow's work session. Here's what it looks like:
Finally, I winched the trailer up and into my 12-foot trailer:
Talk about low wind resistance!! Won't be losing mpg due to the trailer on tomorrow's trip. So now RPI has a useful piece of equipment, pending installation of the Bolens 1250 garden tractor on top of this trailer. When I am ready to install it, I will take the floor off and cut the middle portion out. Then I will install the two side pieces, leaving a gap into which we will lower the 1250. That way we will have places on both sides of the tractor to store tools and supplies while pulling the rail-mower.
Thursday, July 14, 2011
Picked up Mower Deck and Got Things Welded
Today I drove down to San Antonio to pick up my Bolens 18048 mower deck, the one from Portland, OR, which was shipped all the way from there. On the way I stopped at Lloyds Automotive in Driftwood and Lloyd, an acquaintance of mine, welded the tab to the motorcar trailer towbar. So now I will be able to finish the motorcar trailer. Once I got home, I primed and painted the towbar.
Of course it had to be orange to match the trailer. Here's the crated mower deck:
After leaving Driftwood, I headed down to Kyle to pick up IH-35. Along the service road, however, I came upon another auto repair shop. I stopped there and brought in a second piece that needed welding. It was the bumper for the Bolens 1250 garden tractor I am converting into a railmower and it is a key piece to make the tractor fit onto the motorcar trailer. One of the four mounting holes had been wallowed out. So the large space needed to be filled with welding flux and then drilled with a drill press. I left it with them while I went to R&L Carriers to pick up the mower deck. It was ready when I got back but the hole they drilled was slightly but definitely off-center. So the question was whether the bumper could be screwed back onto the 1250. When I got back I took the bumper over to the 1250, brought in a jack to support the various pieces so the holes line up and, after several attempts, succeeded in getting all four bolts screwed in. Here's the successful experiment.
I then took the bumper off and sprayed it with orange Rustoleum, next to the towbar so it would blend into the motorcar trailer framework.
Last but not least, I determined to fabricate a floor for the motorcar trailer so we can use it during work sessions. I bought a 4x8 piece of 11/32 plywood, cut down to 4 feet x 83" to fit the trailer, and yesterday and today primed and sprayed it white.
Tomorrow morning I will be up by 7:00 am, walk the dogs, and then drill three 27/64" holes (to fit 3/8" bolts) on each side of the plywood slab. Then I will fit the floor in to the trailer, tighten the bolts down, reassemble the towbars and, voila, we should have a functional trailer. Before taking it to Llano this Saturday I will throw in two rubber mats from my conveyor belting RPI fundraiser. They should be useful in showing how the belting can protect an ordinary wooden floor. And the trailer will be very helpful to keep tools, fuel and other stuff while running down the track.
Of course it had to be orange to match the trailer. Here's the crated mower deck:
After leaving Driftwood, I headed down to Kyle to pick up IH-35. Along the service road, however, I came upon another auto repair shop. I stopped there and brought in a second piece that needed welding. It was the bumper for the Bolens 1250 garden tractor I am converting into a railmower and it is a key piece to make the tractor fit onto the motorcar trailer. One of the four mounting holes had been wallowed out. So the large space needed to be filled with welding flux and then drilled with a drill press. I left it with them while I went to R&L Carriers to pick up the mower deck. It was ready when I got back but the hole they drilled was slightly but definitely off-center. So the question was whether the bumper could be screwed back onto the 1250. When I got back I took the bumper over to the 1250, brought in a jack to support the various pieces so the holes line up and, after several attempts, succeeded in getting all four bolts screwed in. Here's the successful experiment.
I then took the bumper off and sprayed it with orange Rustoleum, next to the towbar so it would blend into the motorcar trailer framework.
Last but not least, I determined to fabricate a floor for the motorcar trailer so we can use it during work sessions. I bought a 4x8 piece of 11/32 plywood, cut down to 4 feet x 83" to fit the trailer, and yesterday and today primed and sprayed it white.
Tomorrow morning I will be up by 7:00 am, walk the dogs, and then drill three 27/64" holes (to fit 3/8" bolts) on each side of the plywood slab. Then I will fit the floor in to the trailer, tighten the bolts down, reassemble the towbars and, voila, we should have a functional trailer. Before taking it to Llano this Saturday I will throw in two rubber mats from my conveyor belting RPI fundraiser. They should be useful in showing how the belting can protect an ordinary wooden floor. And the trailer will be very helpful to keep tools, fuel and other stuff while running down the track.
Monday, July 11, 2011
Bought Another Bolens 18048 Mower Deck
I've been worrying about the 18048 deck that came with the 1250 garden tractor, since it was in terrible shape, really badly corroded, and had doubts whether it could be renovated. And even if it was renovated, it might break down. So I looked around for a deck, but the nearest possibility is in St. Louis, MO, which would cost about dols 900 just in mileage costs to do a round-trip, not to mention food and lodging on the way. I found a 18048 in really nice shape near Portland, OR, and bargained the price down to dols 250.00. Took a while longer to find a shipper willing to bid on it, but finally arranged shipping today for dols 373.00. The shipper had to crate it and deliver it to their terminal in Portland, while I will pick it up in San Antonio. Here's what it looks like:
I will use this one with my Bolens 1455 garden tractor, leaving the one that we have just rebuilt to be used on the rail-mower. This shipment probably will be delivered to the Portland terminal today and should be available for pickup by Friday, if all goes according to plan. More likely it won't get in until next Monday or Tuesday, but I can deal with that. I might go to a tax convention in St. Louis next month but now I don't have to drag a trailer to pick up a deck.
Monday, July 4, 2011
Installed a Guard
I had a piece of conveyor belting I had cut a month or two ago on hand and decided this weekend was the time to install it on the 1455 mower deck. Picked up the acorn nuts, as called for on the parts list, and other hardware and then drilled holes in the belting. This afternoon I used C-clamps to hold it in place and bolted it on. It projects about 2.5 inches below the edge of the deck, so that ought to provide some pretty good protection against flying objects. Here's what it looks like:
Also installed the roller on the other side of the deck. Not much more to do to this deck, am awaiting judgment from my small engine and tractor guys on whether we can salvage the 1250 deck. If not, then it's starting to look like I either buy and have one shipped in, or road trip. I have a tax preparation convention in St. Louis coming up next month and there are a number of tractors with decks within striking distance, so that's my best shot.
Am starting to realize the rail-mower project will really have its greatest impact not during a year of drought like this, but during those heavy-rainfall seasons. But the restoration we are doing will keep these old tractors and decks going for many years so that will pay off over a long time frame.
Also installed the roller on the other side of the deck. Not much more to do to this deck, am awaiting judgment from my small engine and tractor guys on whether we can salvage the 1250 deck. If not, then it's starting to look like I either buy and have one shipped in, or road trip. I have a tax preparation convention in St. Louis coming up next month and there are a number of tractors with decks within striking distance, so that's my best shot.
Am starting to realize the rail-mower project will really have its greatest impact not during a year of drought like this, but during those heavy-rainfall seasons. But the restoration we are doing will keep these old tractors and decks going for many years so that will pay off over a long time frame.
Saturday, July 2, 2011
Cutting Floor Mats
Today I cut floor mats for my M19AA and for another RPI member's M19, the first customers for our conveyor belt-to-floor mat fundraiser for RPI. It was pretty simple for the M19, just cut a 52" long piece and then cut it in half, yielding two mats 14 7/8" wide each. It was more complicated for the M19AA since I had to make some custom cuts to fit it around the seat supports and under some large bolts. But I ultimately finished both and installed them. Here's what the right side of the M19AA looked like before:
And here's the floor mat with the customs cuts:
Finally, here's the floor mat as installed:
The main point of installing the floor mats, of course, is to keep sharp tools from scraping or damaging the floor. I think these mats will do that as well as make the car look more professional. I already have a single mat in my Woodings and probably will cut another one for the other side.
In other developments, I planned to start reconstructing the Bolens 1250, but took a closer look at the newly-reinstalled drive sheave and found that it does not line up with the PTO pulley, etc. I don't know how to deal with that since if I back the sheave off the shaft a quarter of an inch so it aligns, then the setscrew will be hanging out over the end of the shaft so that it couldn't be tightened down on the square key properly. The probable answer is to pull the sheave off the shaft again and reverse it, but I will wait to consult before doing that. Just another bump in the road toward completion.
And here's the floor mat with the customs cuts:
Finally, here's the floor mat as installed:
The main point of installing the floor mats, of course, is to keep sharp tools from scraping or damaging the floor. I think these mats will do that as well as make the car look more professional. I already have a single mat in my Woodings and probably will cut another one for the other side.
In other developments, I planned to start reconstructing the Bolens 1250, but took a closer look at the newly-reinstalled drive sheave and found that it does not line up with the PTO pulley, etc. I don't know how to deal with that since if I back the sheave off the shaft a quarter of an inch so it aligns, then the setscrew will be hanging out over the end of the shaft so that it couldn't be tightened down on the square key properly. The probable answer is to pull the sheave off the shaft again and reverse it, but I will wait to consult before doing that. Just another bump in the road toward completion.
Thursday, June 30, 2011
Progress on three fronts
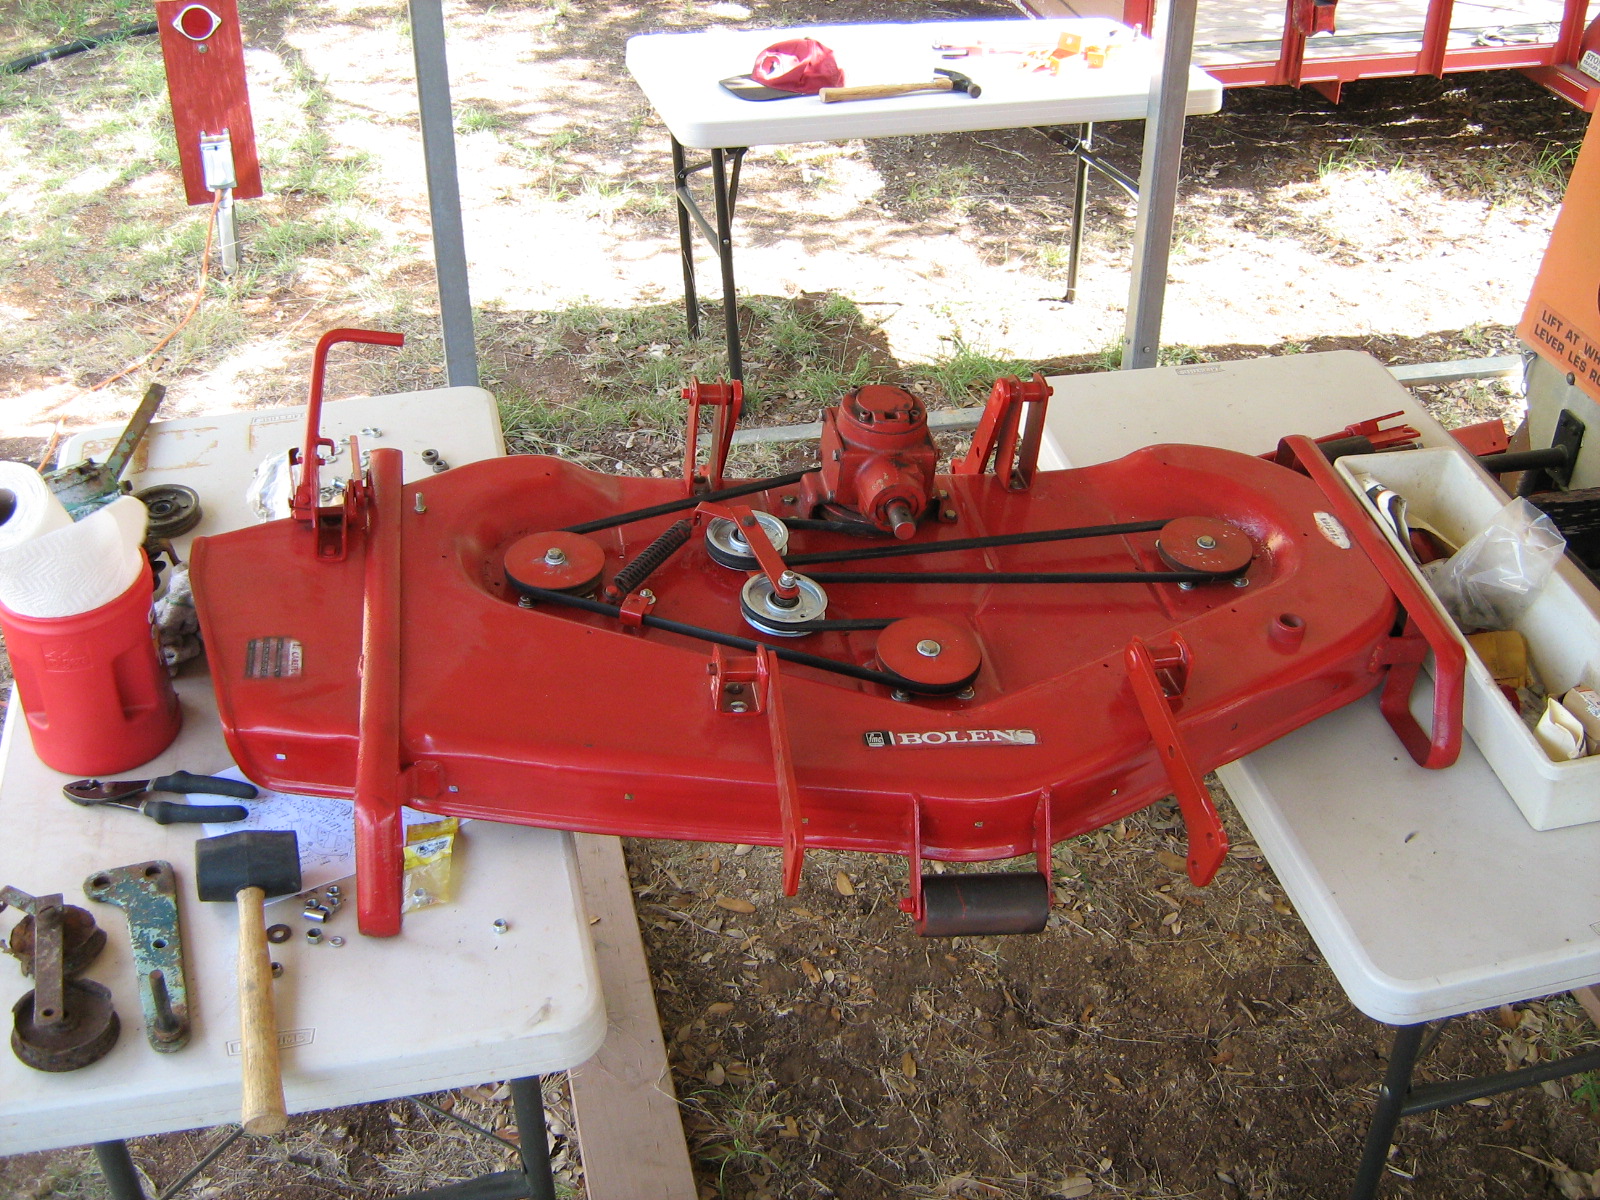
My small engine guy and his friend (who has about 15 tractors) came over last night to help finish off the Bolens 1455 mower deck renovation. Derek installed an idle tensioner pulley and then mounted the belt, leaving the deck essentially complete. I still have to install a guard using conveyor belting but have already cut it. We won't install the belt covers until we have watched the deck to be sure it runs OK. Here's what it looks like now (above).
Then we contemplated the 1250 mower deck, almost a twin to the 1455 deck, which is pretty rough. Derek cut the gearbox off the deck with an angle grinder. We already know all of the sleeve bearings in the hanger spindles are shot, but I have replacements ready to go. Derek and Donnie agreed that we could weld a steel plate on the underside to strengthen the corroded area around the gearbox without changing the height of the gearbox in relation to the pulleys on the top. We loaded the deck into Derek's pickup to take over to Donnie's place so they can try to get the blade bearings out without taking off the bearing housings, which probably would be shot if they had to be removed. So we will see whether they think the deck can be fixed up to work well. If it can, they probably will sandblast it so I can prime and paint it. This is what it looks like right now:
Finally, Derek and Donnie installed the deck sheave onto the main shaft of the Bolens 1250 that is to be used for the rail-mower. I had already cleaned up the shaft with a wirewheel and cleaned out the inside of the sheave with steel wool. So it went on fairly easily, with some persuasion from a rubber mallet. Derek also tapped in the 3/16 inch square key. Now I just have to tighten up the set-screws and begin re-installing the front end, including the PTO belts, the battery and gas tank platform and the gas tank. Then it will be ready for my next work session with Frank Glatzl, which looks like it will happen on or about July 17. At that session we will install the NOS Wisconsin fuel pump, the throttle and choke cables, and see if the engine fires up. If it works, we will then move the tractor underneath the hoist I built, hook some chains on it to hold it up and begin disconnecting the hydraulic pump and rear axle, as well as the front wheels. Lots of work still ahead but starting to see daylight.
Then we contemplated the 1250 mower deck, almost a twin to the 1455 deck, which is pretty rough. Derek cut the gearbox off the deck with an angle grinder. We already know all of the sleeve bearings in the hanger spindles are shot, but I have replacements ready to go. Derek and Donnie agreed that we could weld a steel plate on the underside to strengthen the corroded area around the gearbox without changing the height of the gearbox in relation to the pulleys on the top. We loaded the deck into Derek's pickup to take over to Donnie's place so they can try to get the blade bearings out without taking off the bearing housings, which probably would be shot if they had to be removed. So we will see whether they think the deck can be fixed up to work well. If it can, they probably will sandblast it so I can prime and paint it. This is what it looks like right now:
Finally, Derek and Donnie installed the deck sheave onto the main shaft of the Bolens 1250 that is to be used for the rail-mower. I had already cleaned up the shaft with a wirewheel and cleaned out the inside of the sheave with steel wool. So it went on fairly easily, with some persuasion from a rubber mallet. Derek also tapped in the 3/16 inch square key. Now I just have to tighten up the set-screws and begin re-installing the front end, including the PTO belts, the battery and gas tank platform and the gas tank. Then it will be ready for my next work session with Frank Glatzl, which looks like it will happen on or about July 17. At that session we will install the NOS Wisconsin fuel pump, the throttle and choke cables, and see if the engine fires up. If it works, we will then move the tractor underneath the hoist I built, hook some chains on it to hold it up and begin disconnecting the hydraulic pump and rear axle, as well as the front wheels. Lots of work still ahead but starting to see daylight.
Subscribe to:
Posts (Atom)